Results 1 to 4 of 4

Thread: Matt's Pinch Weld "How To"

  1. #1
    Lifetime Member Getting Dirty Matt's Avatar
    Join Date
    Feb 2011
    Posts
    7,771
    Rep Power
    22

    Matt's Pinch Weld "How To"

    **CLICK HERE to go to the discussion thread***

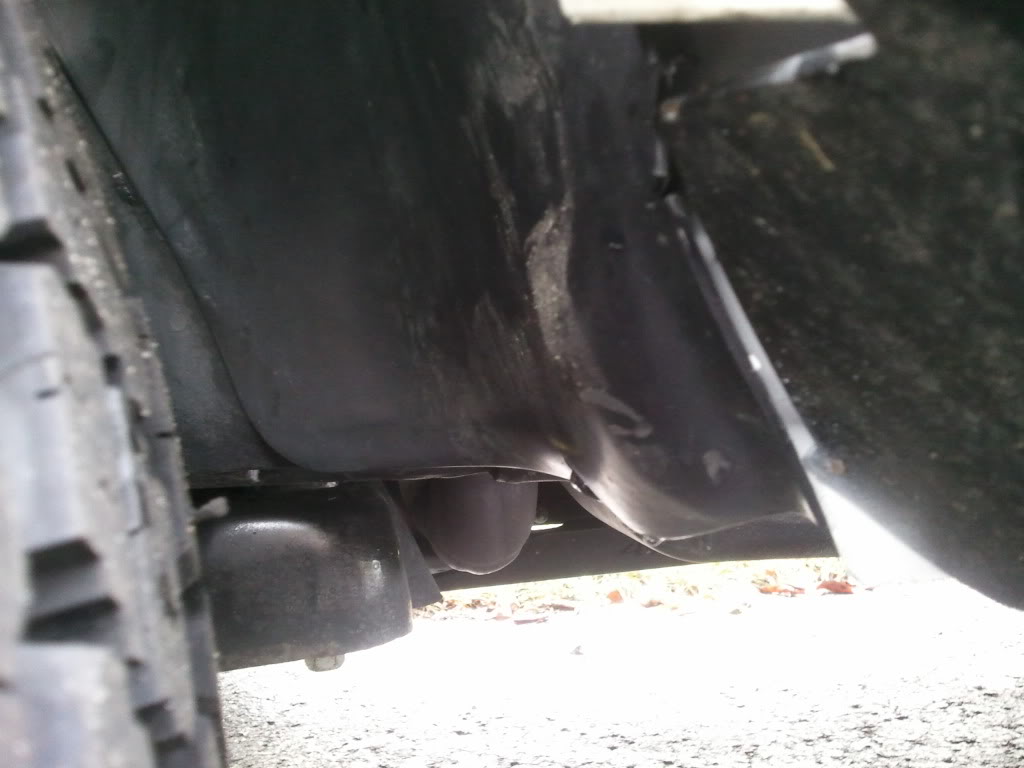
    I've seen quite a few "hacked up" pinch welds. Figured i'd modify mine and take some pictures along the way, hopefully mitigating fears that other members may have. Done properly, it'll look factory and give you almost 1.5" more clearance for tires.


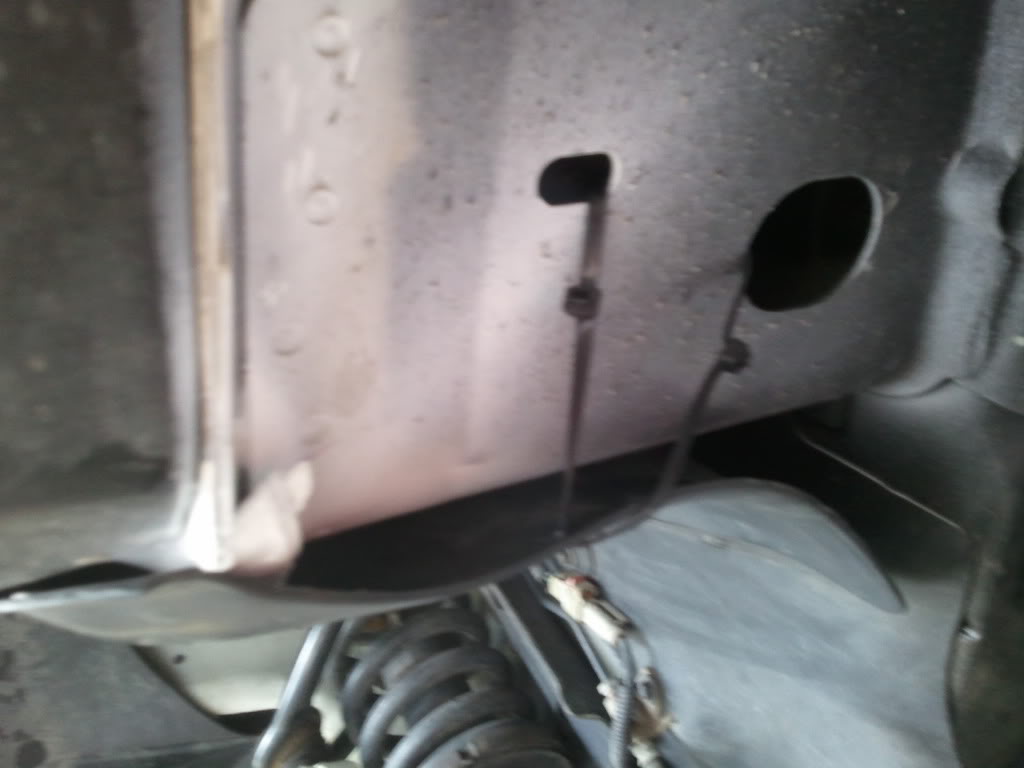
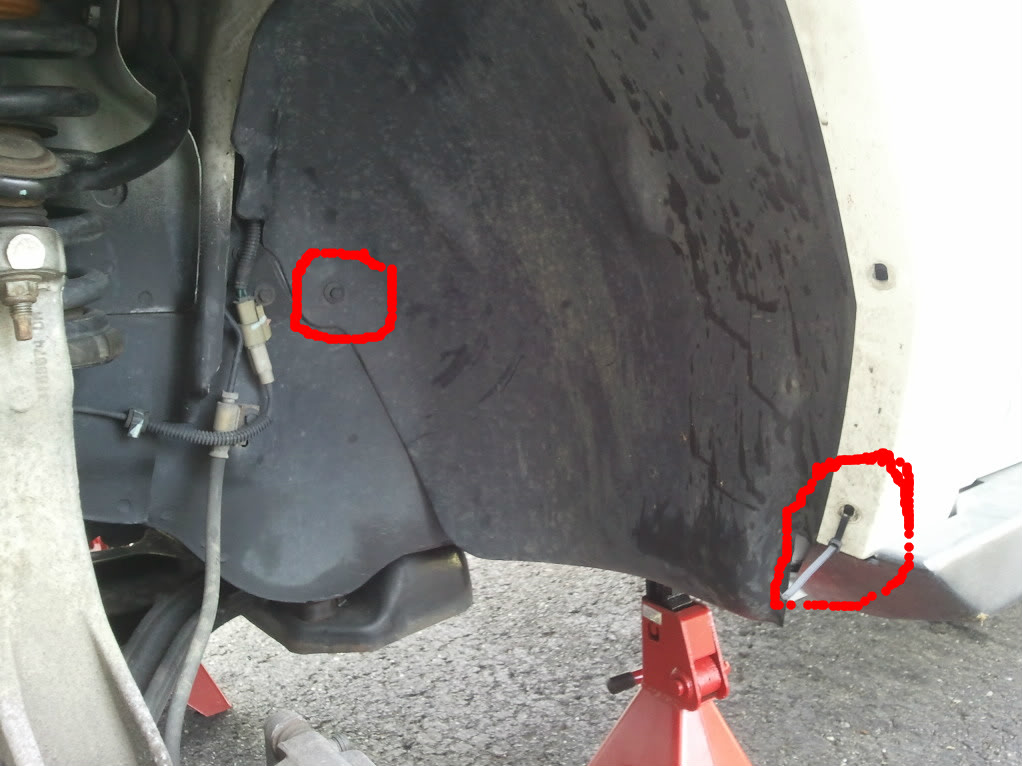
    1) Remove fender well liner
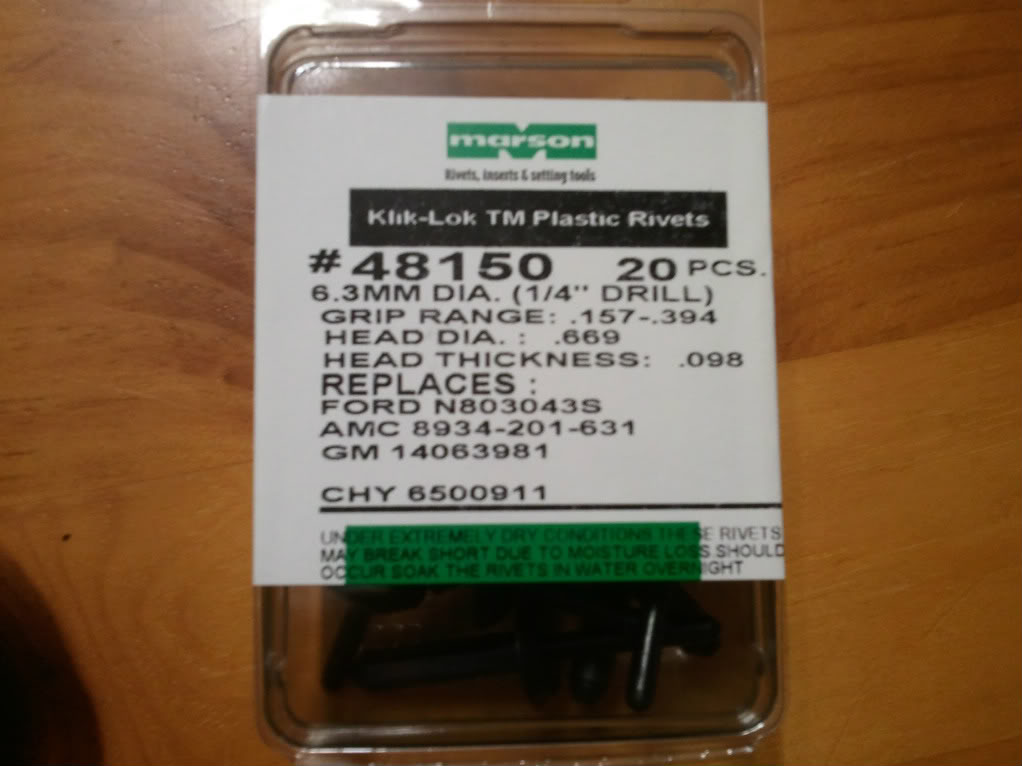
    This is pretty simple. Best way to get the plastic rivets off is to punch the center through with a small philips screwdriver. Once you punch the center through, they pull right out. Then there's two more push clips that you can use dikes (diagonal cutters/snips/et) to pull out.

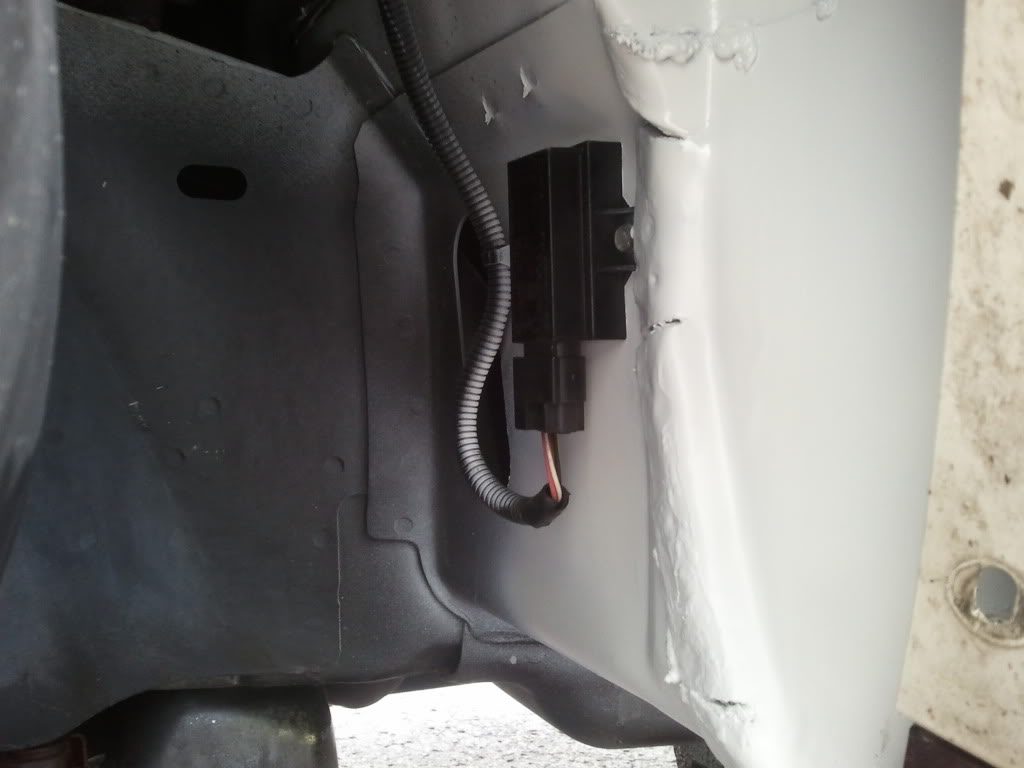
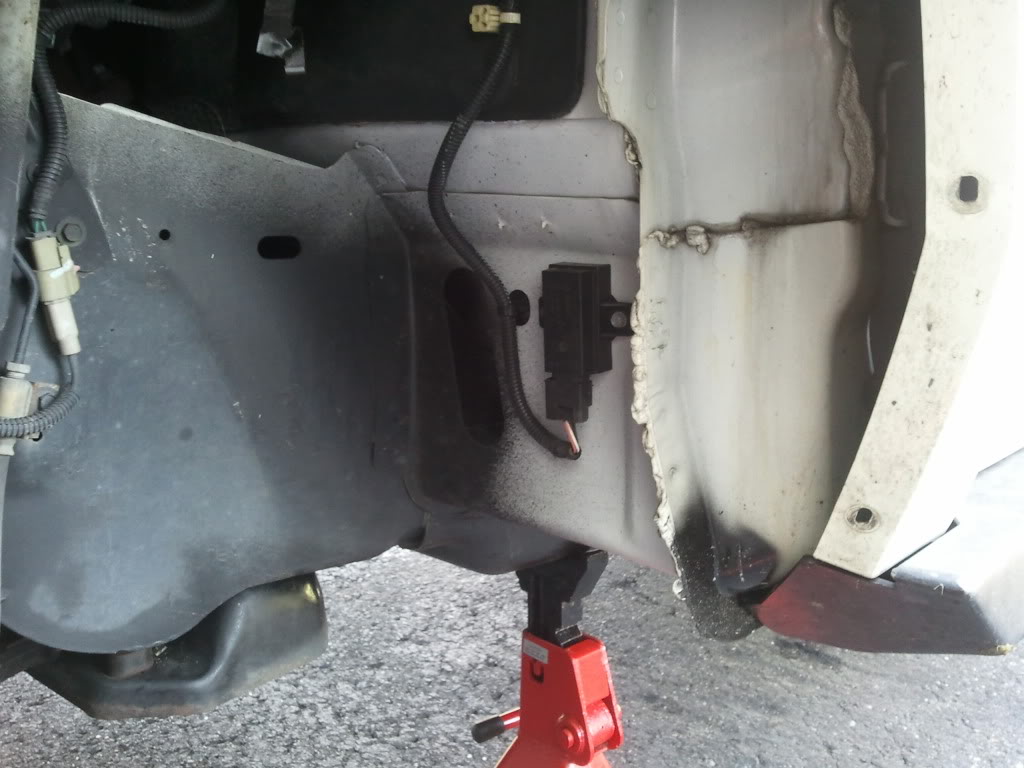
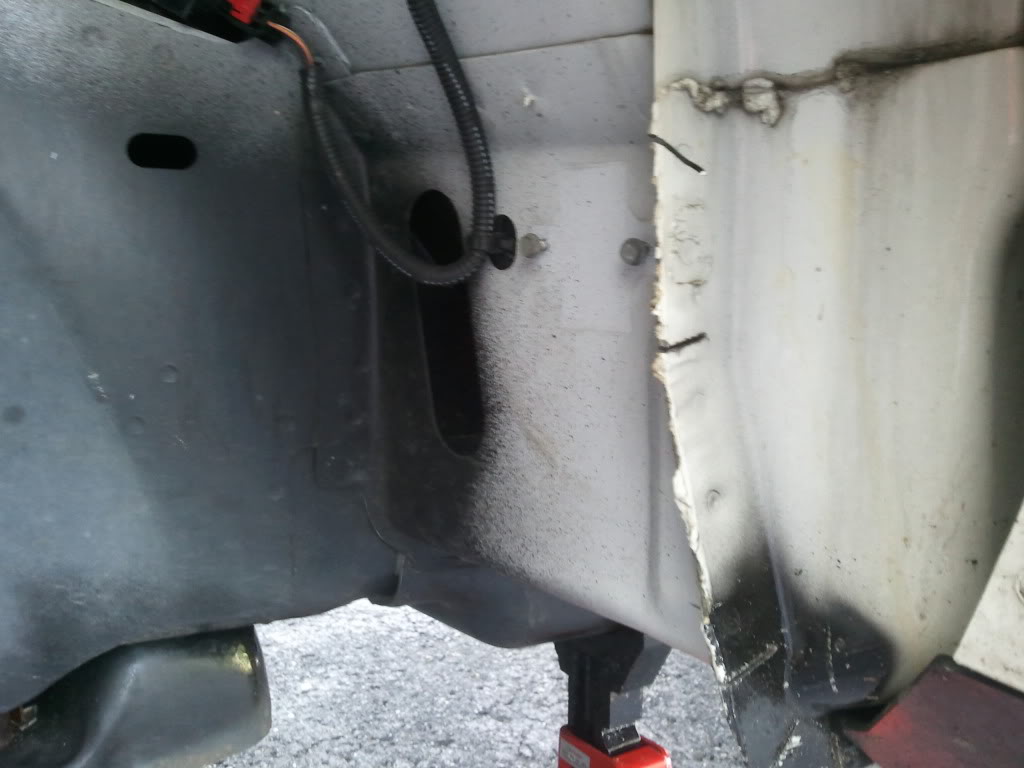
    2) Remove the TPMS receiver and tuck away somewhere safe. This is a bit more challenging on the passenger side because one of the screws is hidden by the coolant lines... but they flex right out of the way.


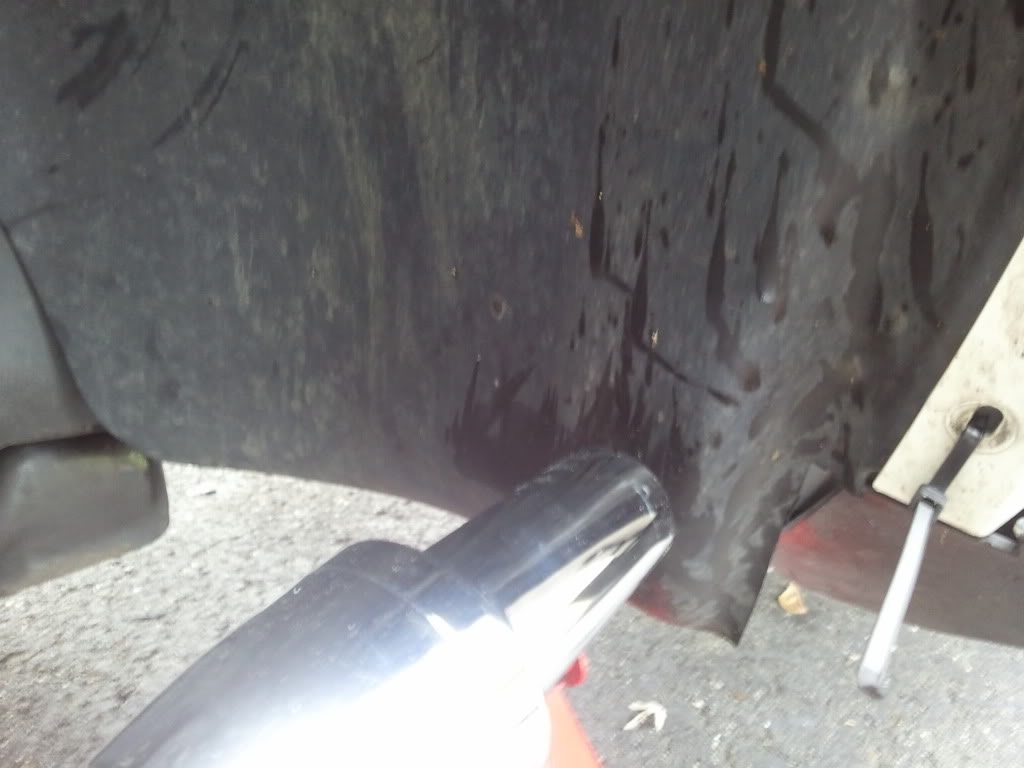
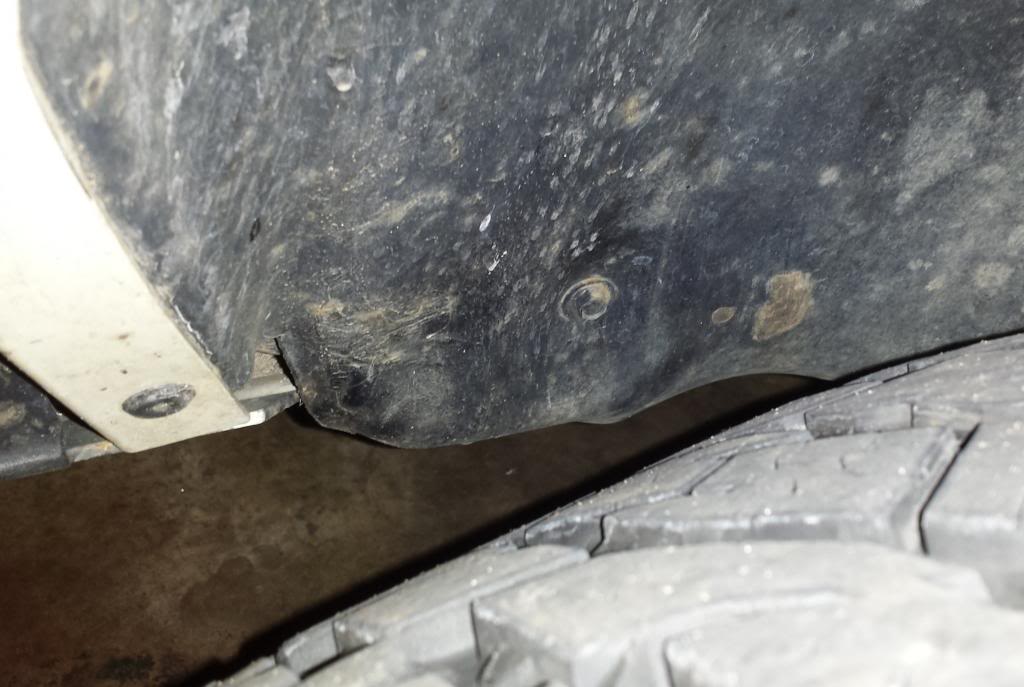
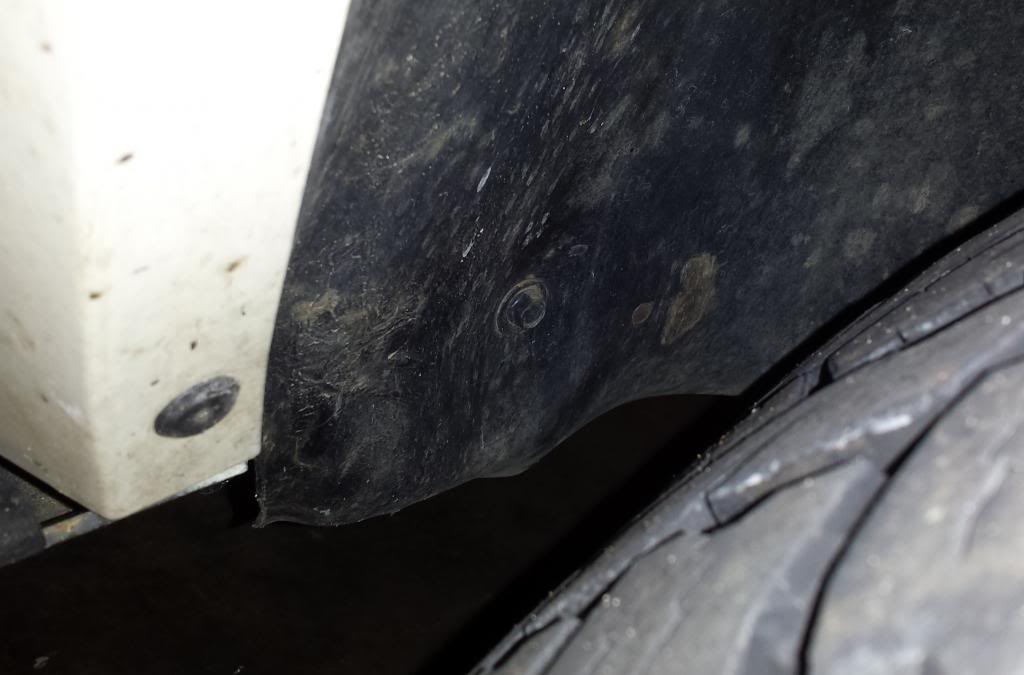
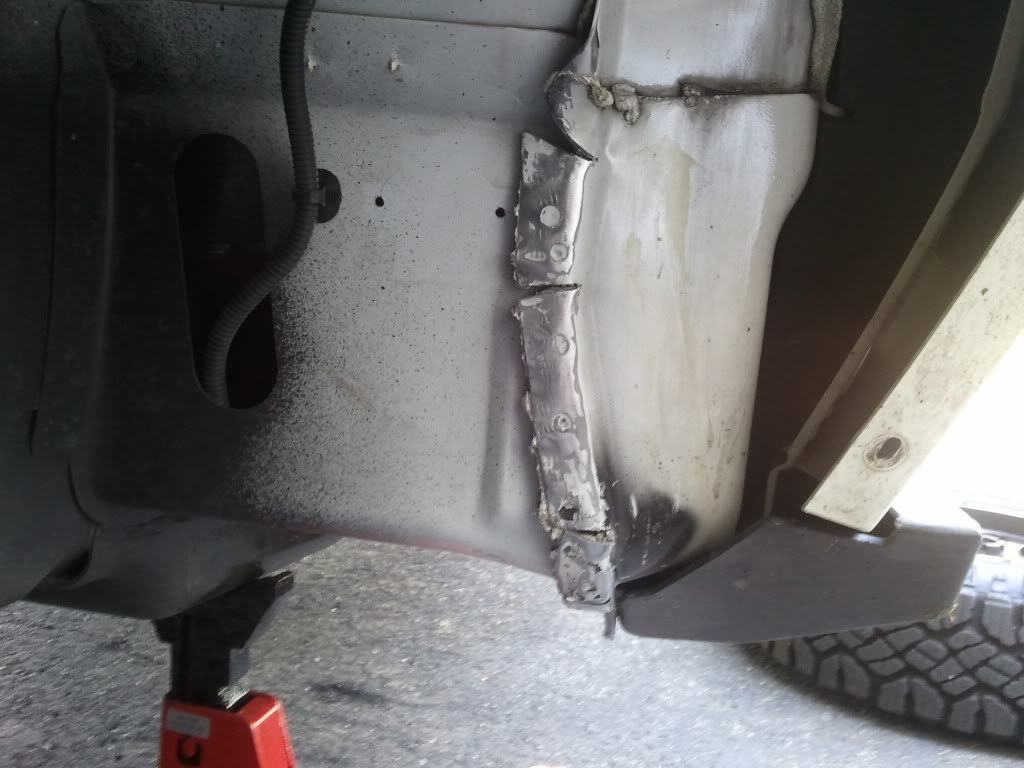
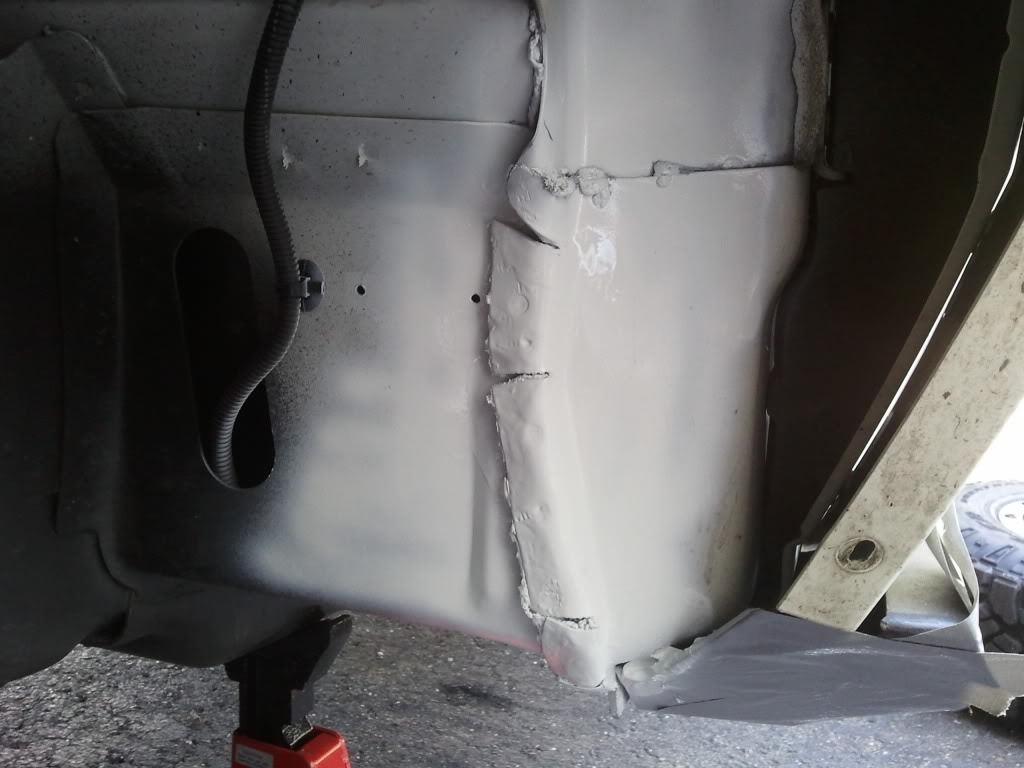
    3) Cut slices in pinch weld as shown... this will allow you to bend over the pinch weld much easier and cleaner.


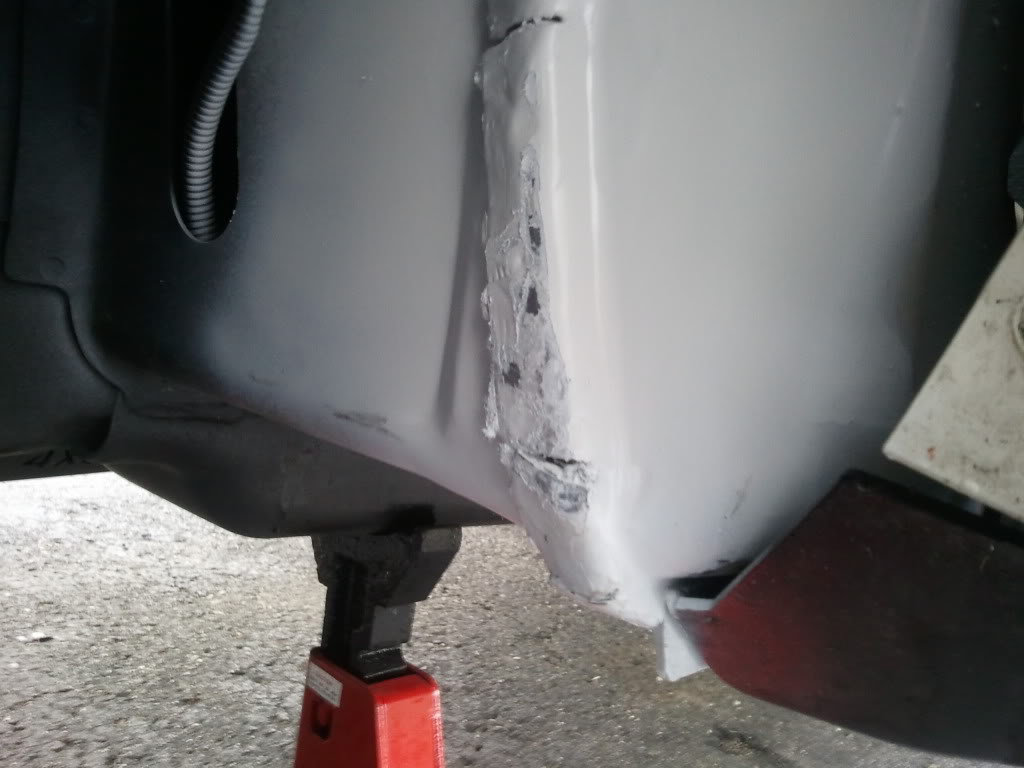
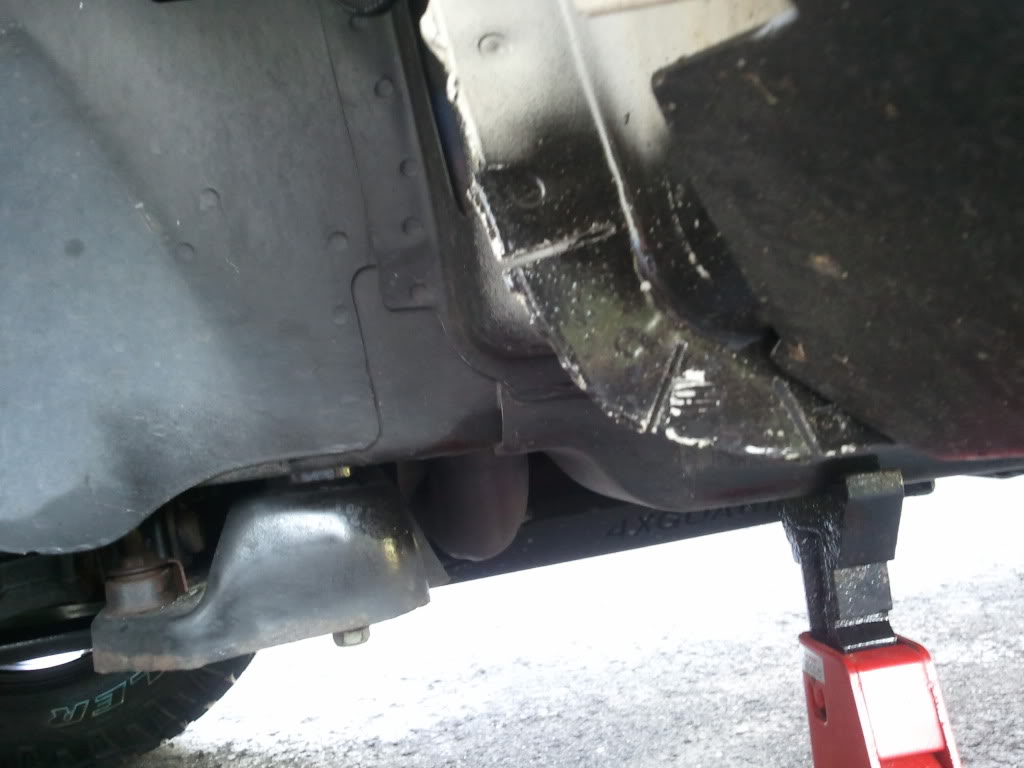
    4) I used a big pair of vice grips to bend over the pinch weld. Get it as far as possible, then flatten it out with a hammer (i used a 3lb sledge). Then clean the surface so its nice and smooth for primer.


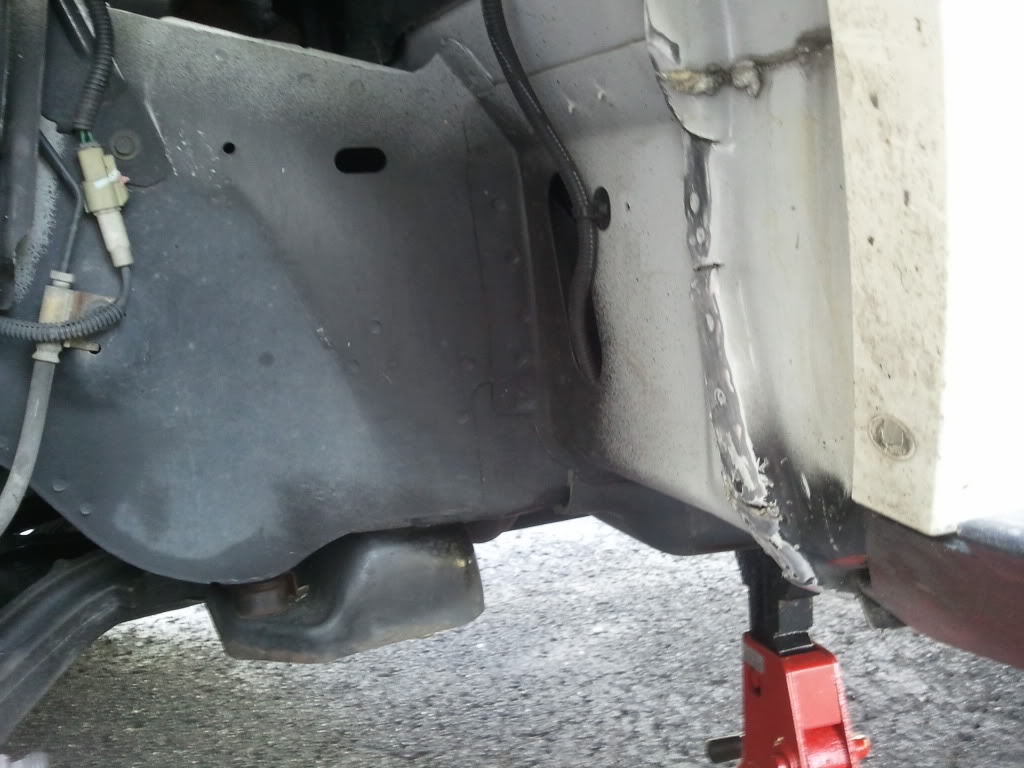
    5) I put a lot of coats on and make sure you shoot some behind the bends you created.


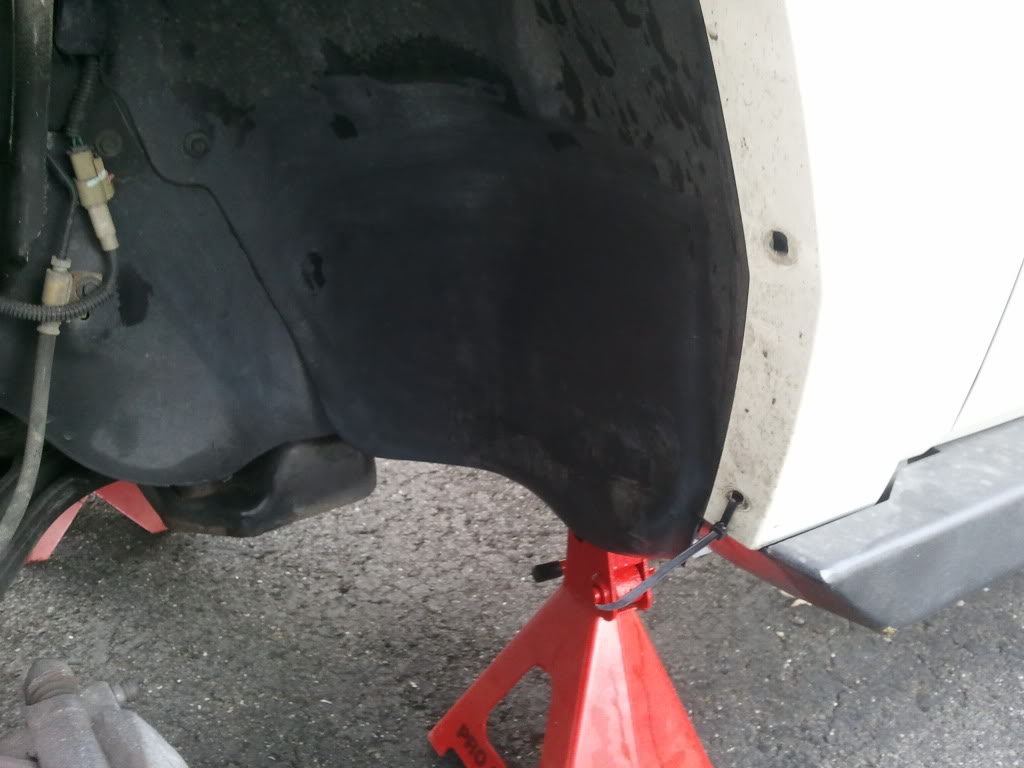
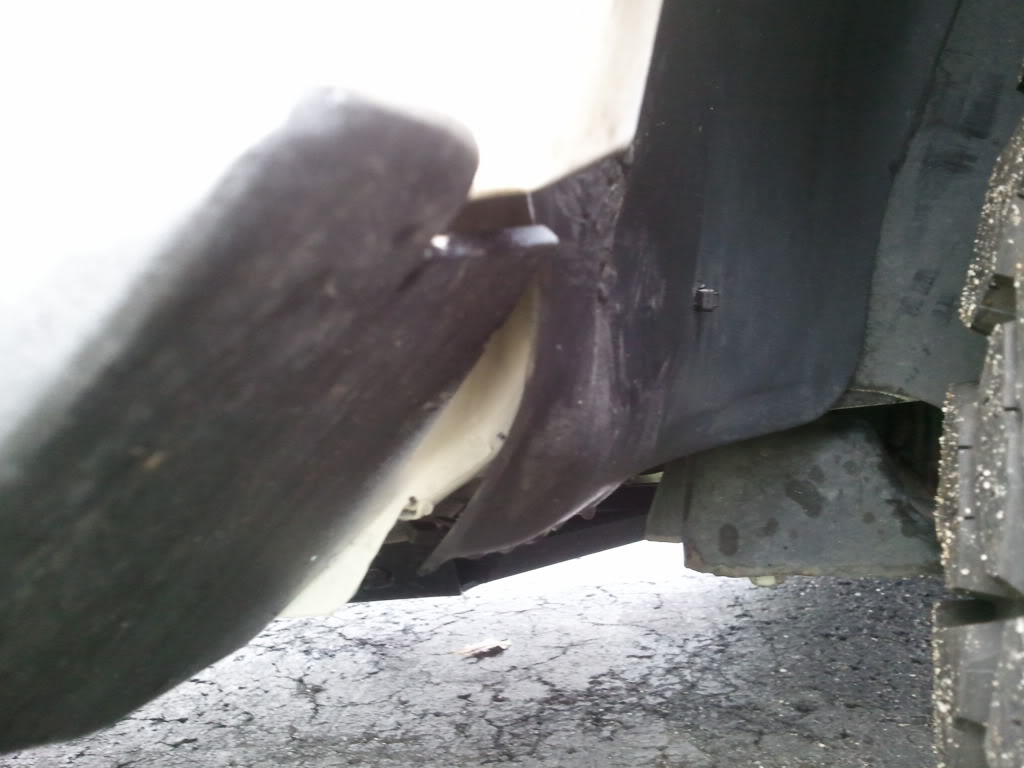
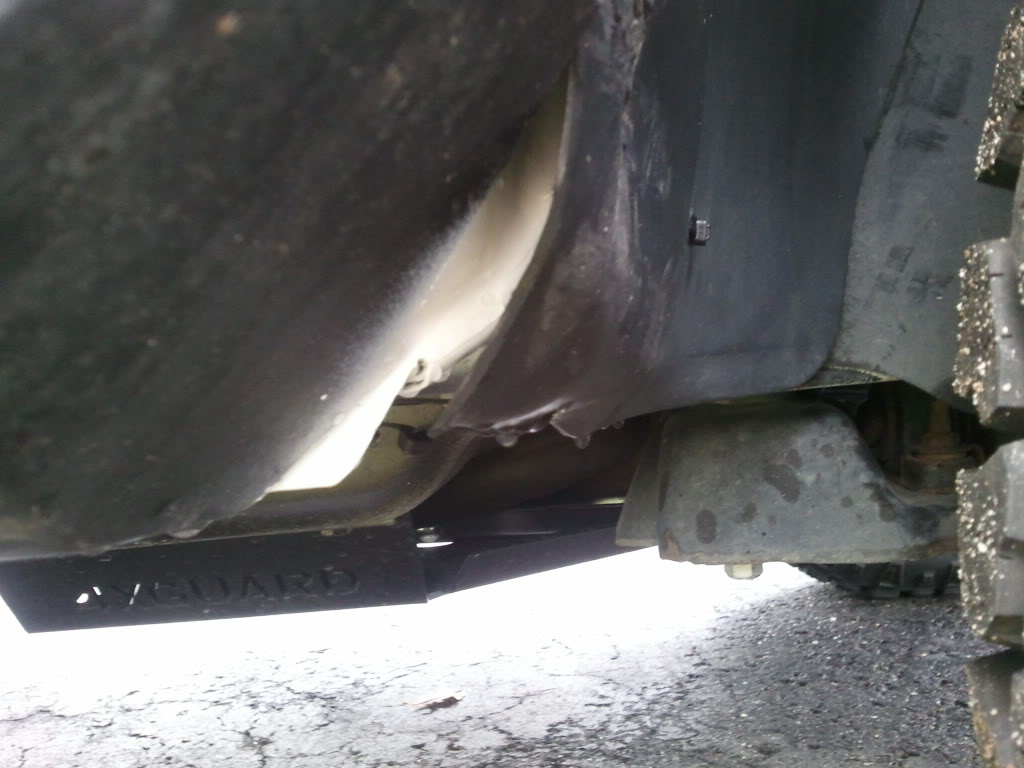
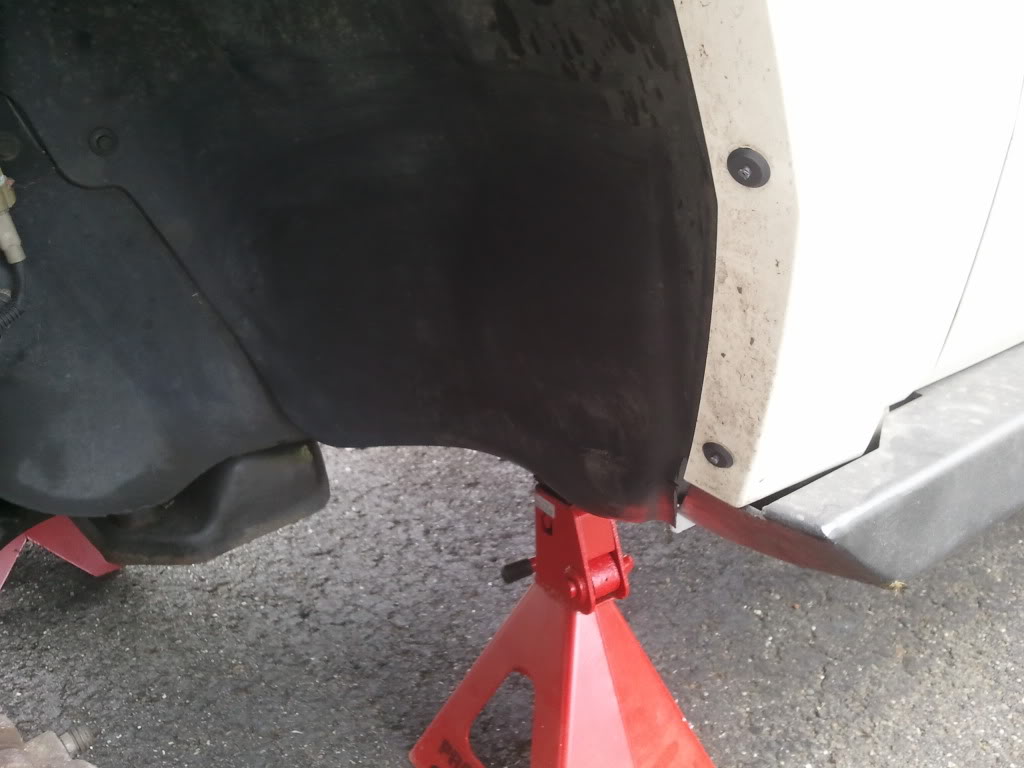
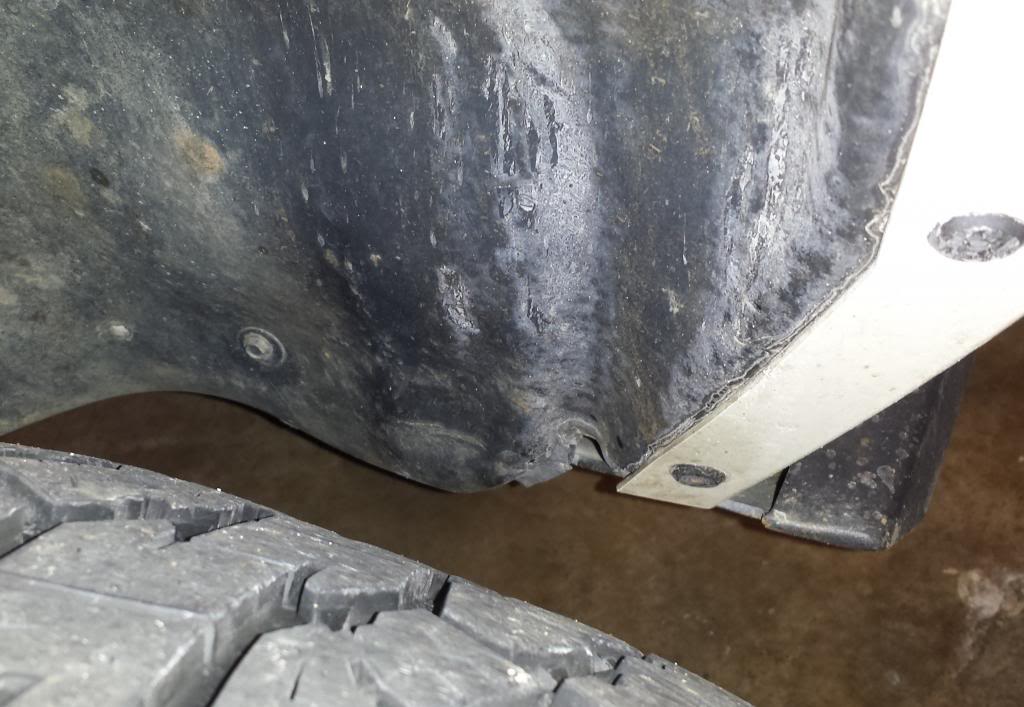
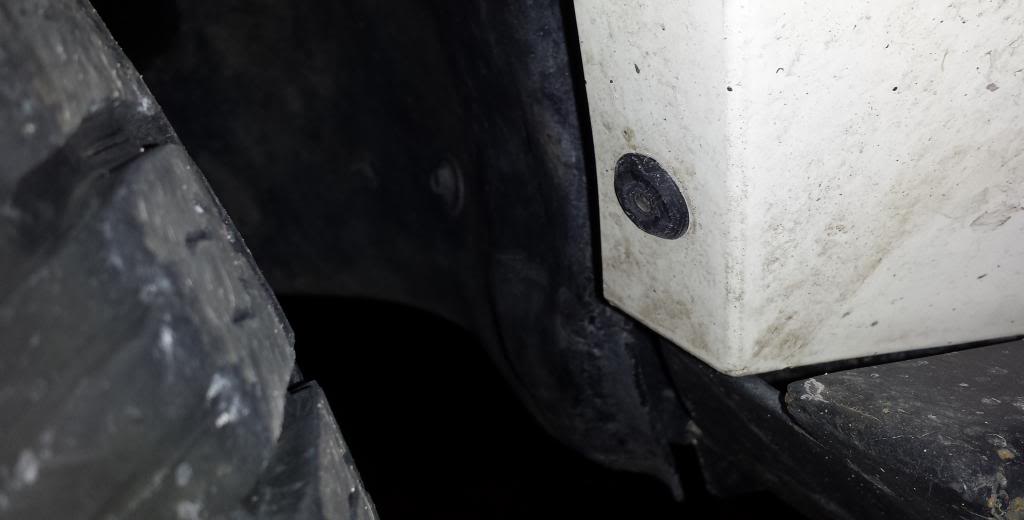
    6) After it dries, put the liner back in. NOTE: DO NOT PUT THE TPMS RECEIVER BACK IN PLACE YET!! Secure the front of the liner with as many clips as you want since it wont be coming back out. Secure the rear section of the liner with the push clip on the body and a zip tie on the lower fender flare mount as shown.

    Last edited by Matt; 10-04-2011 at 06:56 PM.

  2. #2
    Lifetime Member Getting Dirty Matt's Avatar
    Join Date
    Feb 2011
    Posts
    7,771
    Rep Power
    22
    7) Note: In lieu of the following instructions for shaping the liner, an alternate method that I've used on the past 3 pinch welds i've done is to use two self-tapping screws on each liner to pull it back against the fender well. You're not drilling into the vehicle, its an empty exterior cavity. SKIP TO POST #4 FOR DETAILS ON USING SELF TAPPING SCREWS Now back to your regularly scheduled program:
    This part is a bit tricky and im not sure how to explain my method of molding the shape of the liner... you'll figure it out, just be patient. Just use a heat gun (i used a cheapy one that i bought in college for building an airplane) and a pair of heavy gloves. Heat up the liner and shape it for extra clearance. I had a spray bottle with water.... this helped because i was able to hold the liner how i wanted, then spray it with water so it would cool down quicker to keep its form.

    This is also why you don't want to put the TPMS receiver back in place before this step, it would get damaged from the heat.

    This is also more challenging on the passenger side because of the coolant lines. They don't allow you to mold the liner as far back as you can on the drivers side.


    ^^^^ It's hard to see in the pictures, but the first thing i did was heat up the part of the liner that's convex outwards, then push it in so its concave inwards (this is where you get the bulk of the clearance). When you do that, the bottom of the liner is going to flip towards the wheel well and decrease clearance, but dont worry. After you get that "rubbing" area as concave as possible, make sure you cool the liner down with water. THEN, heat the bottom of the liner below the concave area and flex it back/under the jeep. This results in a really smooth and clean transition. This is actually important because if you're flexing offroad, there wont be an edge for the tire to grip onto and rip up the liner, so if you do rub while flexing the tread will just rub on the liner and not cause damage.


    Here are a few pictures to show the concave sections and how the bottom folds under. Also, FYI, the fender liner is all the way up against the firewall (well, up against the bent pinch weld)... so you gain A LOT of tire clearance via this method.


    8) After you're done shaping the liner, you'll need to pull the rear section away and touch up some of the paint.

    Last edited by Matt; 11-15-2013 at 03:03 PM.

  3. #3
    Lifetime Member Getting Dirty Matt's Avatar
    Join Date
    Feb 2011
    Posts
    7,771
    Rep Power
    22
    9) Once the paint is dry, re-install TPMS Receiver


    10) Install liner.


    11) Last step for me is to strategically place a zip tie to pull the liner back and hold it "firmly" in place. On the passenger side, I put a second zip tie in the liner right where the coolant lines are and tied the liner to the metal bend in the coolant line.


    These two pics work well as a before/after:


    __________________________________________________ ______________
    __________________________________________________ ______________
    SPECIALTY PARTS THAT YOU MAY NOT HAVE:

    For the fender well install you'll need a plastic rivet gun and rivets.

    You can get the rivet gun from harbor freight item # 97757: See if this link works
    You can also get the heat gun from there for cheap, item * 96289 : Hope this one works too
    ^^FYI my heat gun is only 400F... the low setting on that one is 500F and a high setting of 1100F!! I'd use the low setting if i were you.... 400 was enough for me to accidentally melt my liner in a few places

    That set comes with a few of the properly sized rivets. For the rest, you can get them from Mcmaster, Napa, etc. I order a lot of stuff through McMaster so I use part number 90219A340. It's $6.24 for a pack of 20... you'll need 1 pack for the front pinch weld mod.


    COST:
    Rivet Gun $15
    Heat Gun $15
    Rivets $10
    Paint $4

    So if you dont have anything, this mod will cost you ~$45-$50... AND you'll now have a rivet gun that you need for other mods/maintenance on your XK/WK. Heat guns come in handy for other things as well... I don't remember what else i used it for, but i know ive used it at least a few times in my house... (winter window film is one off the top of my head)
    Last edited by Matt; 11-15-2013 at 03:02 PM.

  4. #4
    Lifetime Member Getting Dirty Matt's Avatar
    Join Date
    Feb 2011
    Posts
    7,771
    Rep Power
    22
    I don't bother heating up the liners anymore. I've done at least 4 more pinch weld mods since mine and every one has used self tapping screws to pull the liner back.

    It's pretty simple... i basically put the screw in a location where the tire wouldn't hit it. On the passenger side I went about 1" away from where the rear HVAC lines are.


    A few tips for the passenger side if you have rear HVAC:
    1) Before taking the liner off, use a small drill bit to drill a hole through the wheel well liner and make a mark on the firewall about between 1 and 2 inches away from where the HVAC lines are. Once the liner is off, pre-drill the firewall.
    2) Cut away as much from the plastic HVAC line guide as possible. It sticks out further than it needs to and you'll gain almost 1/2" more clearance.
    3) Because of the HVAC lines you'll want to tighten the screw on this side by hand. If you go too far the liner will start bulging out where the HVAC lines are.


    Last edited by Matt; 01-09-2014 at 07:34 PM.

Thread Information

Users Browsing this Thread

There are currently 1 users browsing this thread. (0 members and 1 guests)

Similar Threads

  1. Matt's Pinch Weld "How To"
    By Matt in forum Technical Articles & How To's
    Replies: 39
    Last Post: 01-09-2014, 07:33 PM
  2. wierd "thud" and "ka-tink" noises after the RC lift went on
    By collinsgto in forum Suspension & Lifts
    Replies: 9
    Last Post: 11-04-2012, 02:39 PM
  3. Pinch Weld
    By CmmdrDan in forum Wheels & Tires
    Replies: 16
    Last Post: 07-22-2011, 08:37 AM
  4. Replies: 12
    Last Post: 04-16-2011, 08:14 AM
  5. Replies: 0
    Last Post: 09-05-2010, 12:55 AM

Posting Permissions

  • You may not post new threads
  • You may not post replies
  • You may not post attachments
  • You may not edit your posts
  •