Results 1 to 5 of 5

Thread: One Dash Switch Installation Option.

  1. #1
    Lifetime Member Getting Dirty 1USMC's Avatar
    Join Date
    Dec 2010
    Location
    South Texas
    Posts
    371
    Rep Power
    14

    One Dash Switch Installation Option.

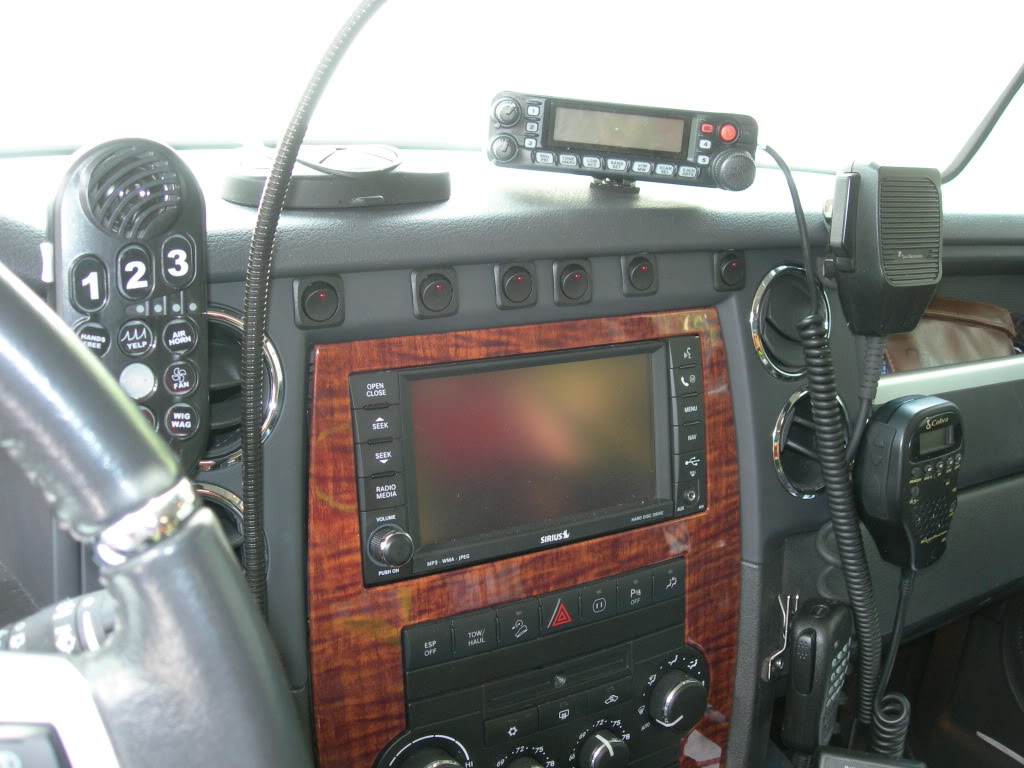
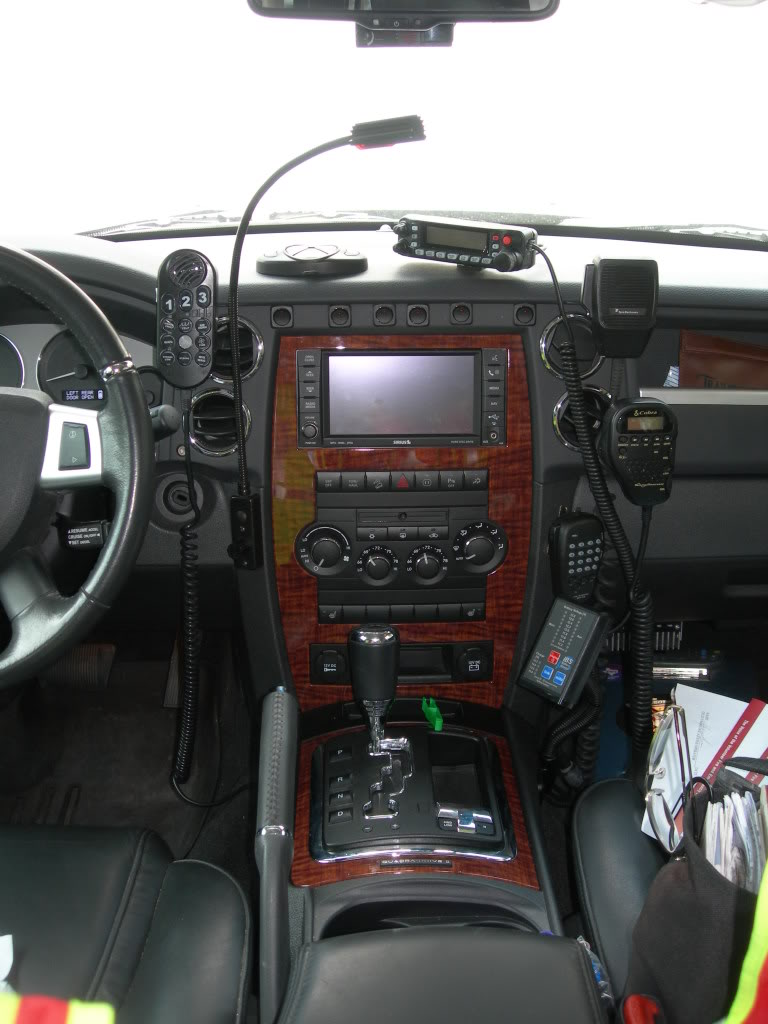
    I wanted to install some light switches to control driving, forward ¼, side scene, and rear lights. I will have the rear lights activated with the backup lights and also by manual selection as many others have done.

    The lights will be also controlled by a flasher and mounted on the roof rack I ordered late February (it is now September). The relays, flasher and diodes and now the switches are installed.

    I wanted the switches to blend and be somewhat low profile as the rest of my dash is not .. Lol..

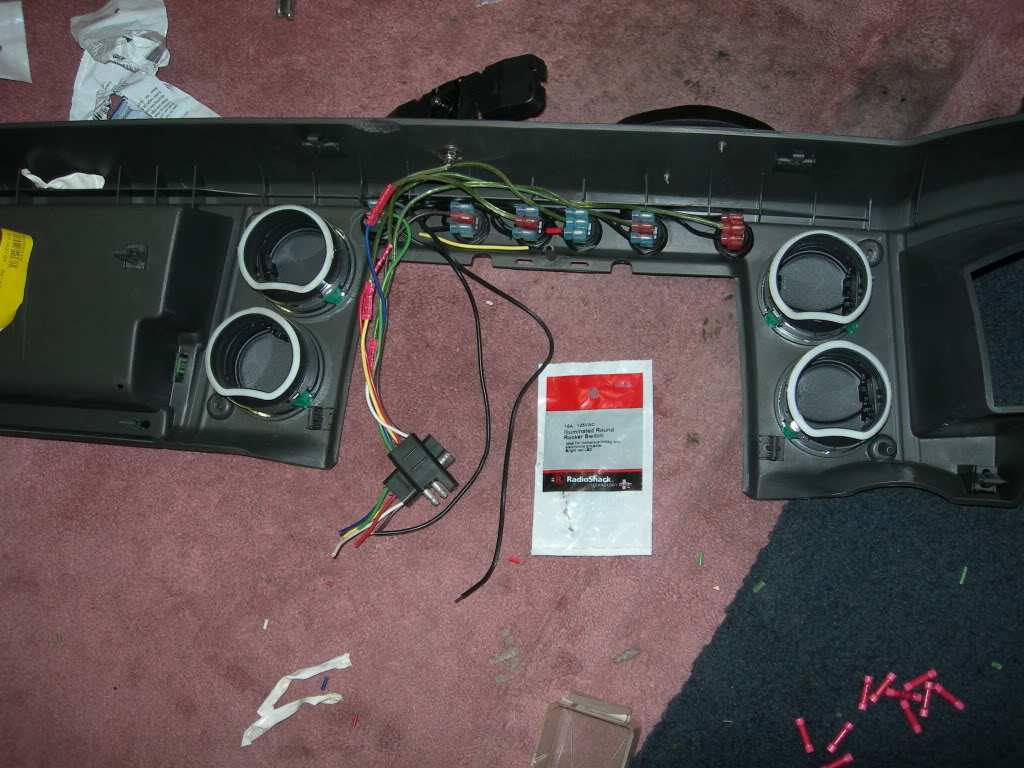
    I picked up the switches at Radio Shack that matched the size and color I wanted. I used regular , step bits, trailer wiring connecters, flag connecters, and my wife’s hand me down hot glue gun ( Ok don’t laugh, it really does come in handy sometimes !).

    We have all had a fun time finding places to mount our switches. I have used others ideas that have posted them, and I would like to pass along this idea, if it can help someone else with one of their projects.

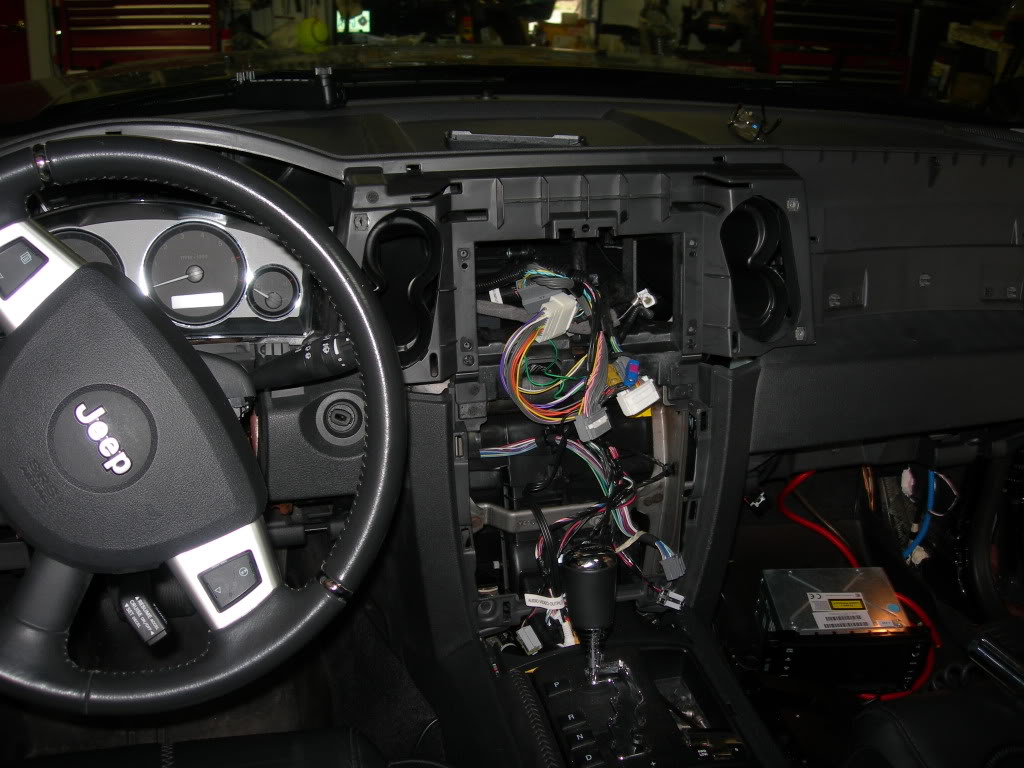
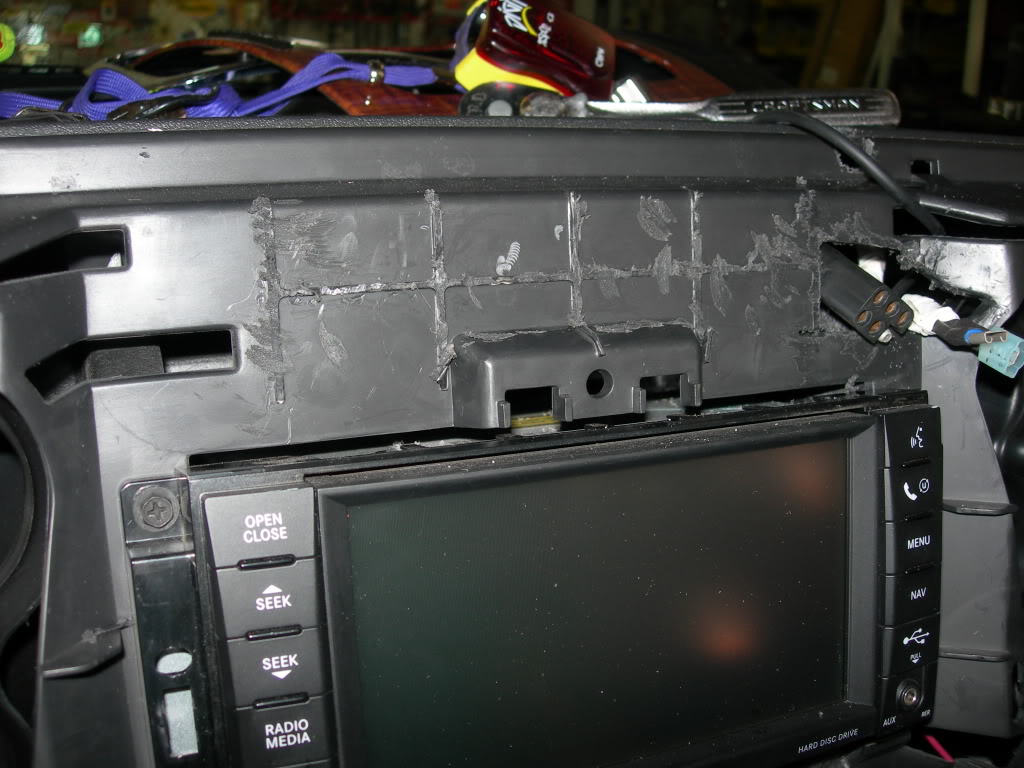
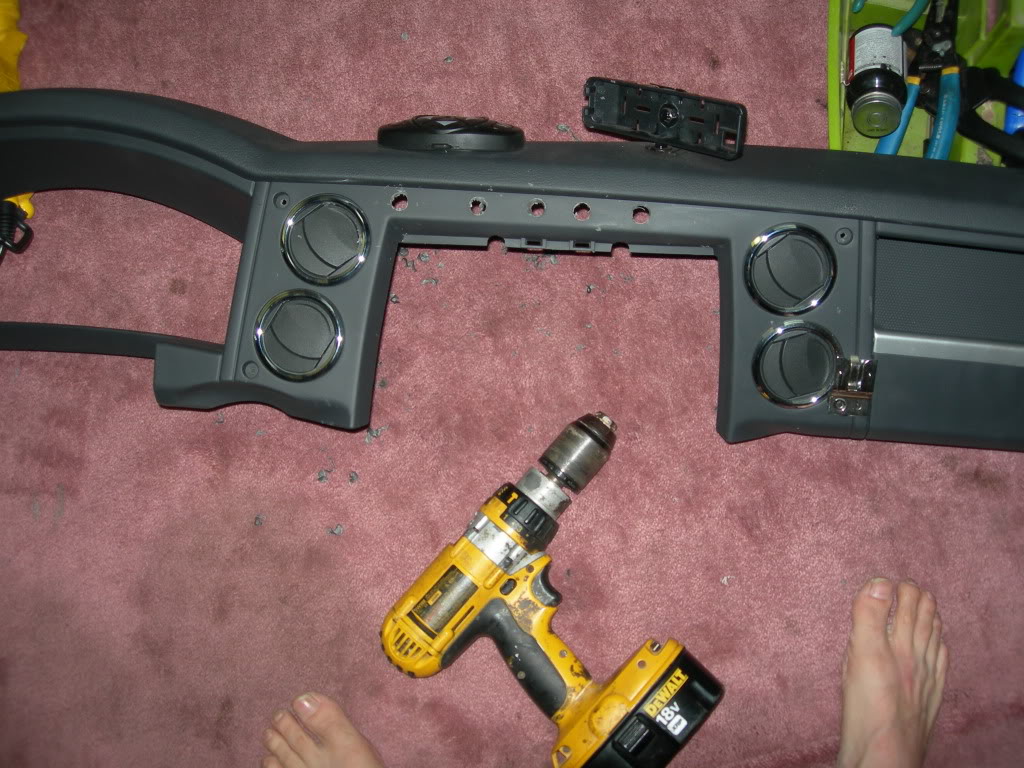
    I needed six switches to control the rack lights the way I wanted. Above the MyGig looked like a possible location.. So… off comes the center dash again.


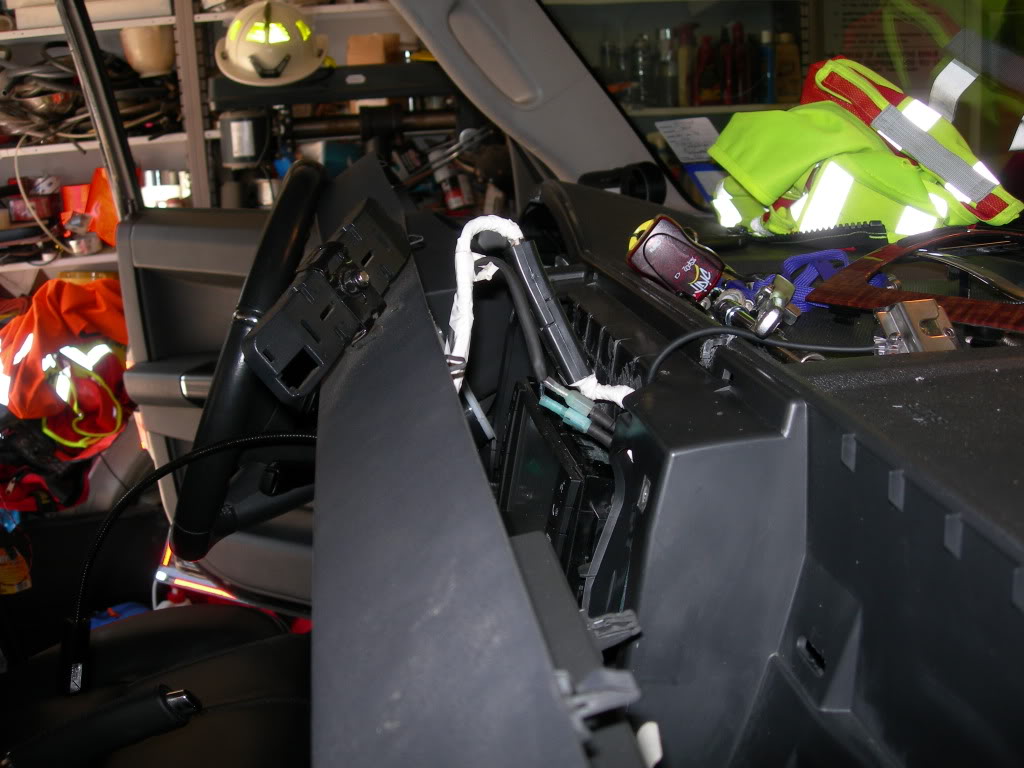
    I cleaned up what I call the fins and enlarged the hole on the right side for my wiring run and trailer and power connecters ( so I could unplug the wiring when removing the dash in the future).


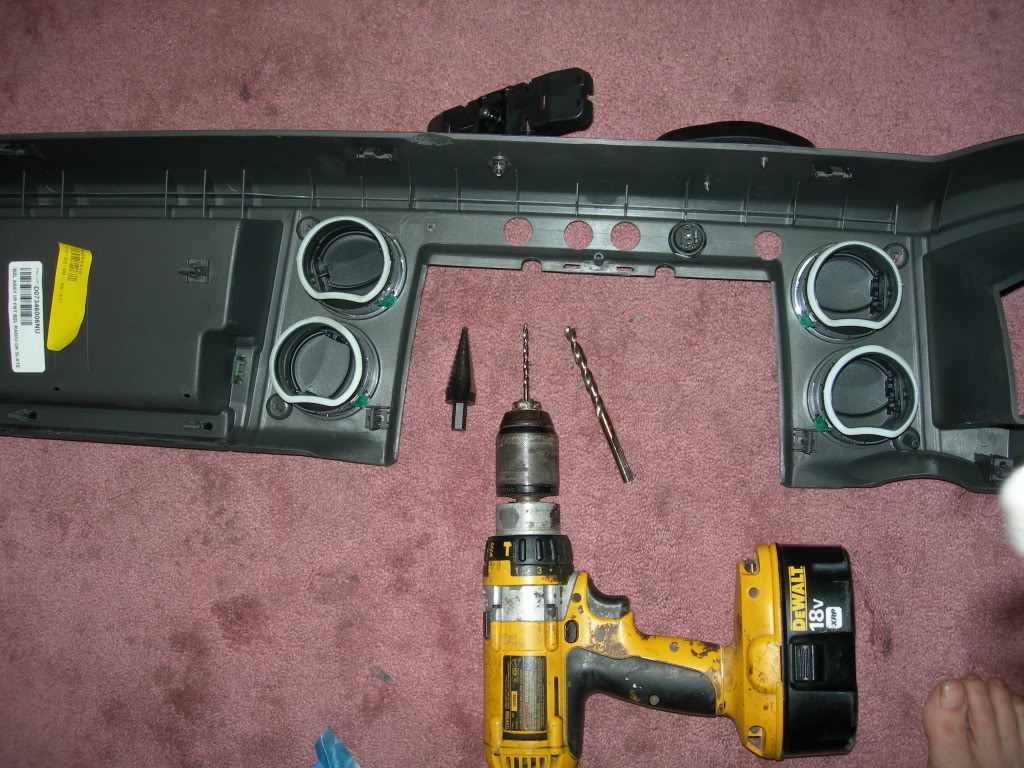
    I used the fins location on the top of dash to help divide up the area into equal parts for switch location.


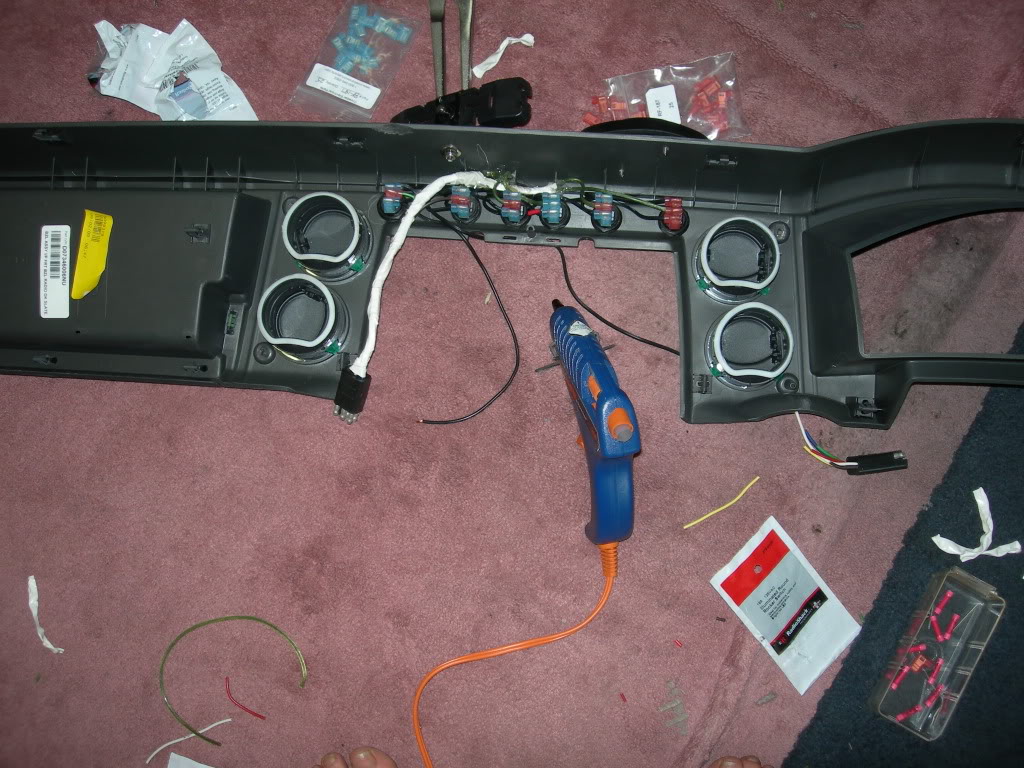
    When I enlarged the holes to their final size, I should have drilled from the front vice the rear. The reason I say this is because I just barely scraped the “top over hang” of the front of the dash above two of my switches with my step bit without realizing it. It rubbed off a little of the finish and is very hard to notice, but it could have been much worse.

    By making the final drilling from the front I could have watched how close I was to all the “finished” surfaces.
    Last edited by 1USMC; 09-10-2012 at 11:30 PM.

  2. #2
    Lifetime Member Getting Dirty 1USMC's Avatar
    Join Date
    Dec 2010
    Location
    South Texas
    Posts
    371
    Rep Power
    14
    Now the wiring, remembering when working from the backside double check you have the left and right sides correct.


    With plenty of slack it goes back together again.


    I tried to get plenty of lighting on the switches (open sun roof etc.) to show them in the photos.

    They do really blend in and are hardly noticeable.

    Note; the red led “on” light is also hardly noticeable during the day, but that was Ok with me.


    Last edited by 1USMC; 09-10-2012 at 11:19 PM.
    2010 Limited > 5.7 > Pearl Black > QDII > 4"¯ Superlift w-SSR > Bilstein HD Struts + 1/4" spacer > RCV cv Axles > JBA 6" Springs + Matt's 1/2" Spacer > BDS adj LCA > 285-65-18 Nitto Trail Grappler MT's > Moto Metal 951 > K&N CAI > Flowmaster 50 > 4xGuard-Front/Belly skids + Grill Hoop w/ Front Receiver + Rear Diff. Guard > PIIA 520 ATP > Front Camera > Steel Armadillo's Rear Bumper/Tire/ Blitz Carrier/Super Sliders +Secure Console > Dual Batteries > OBA > JKS Rear-JBA Front Discos > FlashPaq

  3. #3
    Administrator
    Join Date
    Sep 2019
    Posts
    1
    Blog Entries
    36
    Rep Power
    10
    Another very cool idea, thanks for sharing it with us!
    2006 XK Limited, 5.7L Hemi
    Dark Khaki, QDII, Rocky Road 2.25" lift, Steel Armadillo front bumper with Warn PowerPlant winch, Steel Armadillo rear bumper w/ tire carrier, Rock Sliders, Light Bar & Front Fender Tube Fenders, 4xGuard belly skid plate & rear differential guard, BFG M/T A/T 255/75R17s on Rubicon rims, Spidertrax 1.5 inch wheel spacers, Rhino Rack Pioneer Tray with FoxWing Awning, Superchips VIVID Programmer, Air Flow snorkel, Steel Armadillo Secure Console, Cobra CB Radio, Lock Pick Video Programmer, ASFIR Skid Plates.

    Knappster's Garage


    Profile for Knappsters

    AKA: the Owner of The Steel Armadillo L.L.C.

  4. #4
    Lifetime Member Getting Dirty pjmjr508's Avatar
    Join Date
    Jan 2011
    Location
    Everett WA
    Posts
    1,673
    Rep Power
    15
    Nice work
    PJMJR508
    (Happy Jeep)

  5. #5
    Lifetime Member Getting Dirty Sal-XK's Avatar
    Join Date
    Jun 2010
    Location
    Raeford NC
    Posts
    5,201
    Rep Power
    20
    That thing is going to need a training course in how to operate it soon LOL nice work though!

Thread Information

Users Browsing this Thread

There are currently 1 users browsing this thread. (0 members and 1 guests)

Similar Threads

  1. Switch Placement
    By Brandon1024 in forum Interior Modifications
    Replies: 18
    Last Post: 07-17-2012, 04:40 PM
  2. Trail Dash
    By Knappster in forum Superchips
    Replies: 3
    Last Post: 05-27-2012, 06:04 PM
  3. Ignition Switch
    By BonesWK in forum Stereo / Electronics / Electrical
    Replies: 5
    Last Post: 04-25-2012, 05:29 AM
  4. Another roof rack option - Kuat Vagabond
    By Matt in forum Exterior Modification
    Replies: 2
    Last Post: 12-13-2011, 05:15 AM
  5. How To Remove The XK/XH Dash
    By Knappster in forum Technical Articles & How To's
    Replies: 0
    Last Post: 09-20-2010, 12:52 PM

Posting Permissions

  • You may not post new threads
  • You may not post replies
  • You may not post attachments
  • You may not edit your posts
  •