


Ok... since I'm going with FULL-SIZE gear that doesn't fit in any of the cubbyholes of our Jeep Commander's dash, I thought I'd start a seperate thread, since this isn't going to look like ANYTHING like what ya'll mugs have done!
I THOUGHT I was going to get it ALL done in ONE day, on my day off yesterday. Well... THAT didn't work out as planned.Had to burn an hour+, to pick up #3 son, who got sick at day camp. Made FOUR trips to the hardware store - for mounts, bolts, nuts, screws, washers - TWO drill chucks, and finally, a 3/4" sanding bit (1/10th the cost of a 1" drill bit, I might add!), before all was said and done as well.
The REAL pain in the arse though, turned out to be the scanner antenna mount. I basically spent the rest of the DAY, drilling and sanding it.
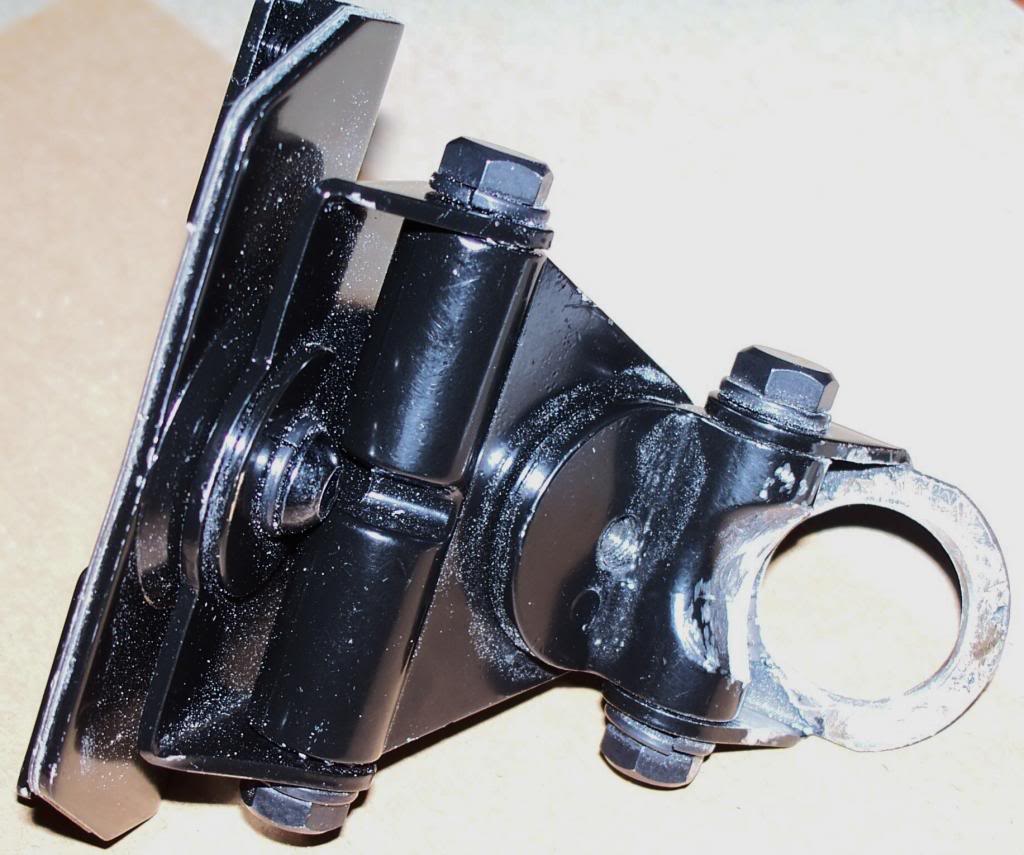
It's an NCG Comet 730, which, UNLIKE the model 720, DOESN'T provide an NMO mount. So you've got to drill/sand the PL-259/Comet 5/8" hole, out to 7/8" at a minimum, to get the NMO base through! And brudda, it takes LONGER than you think...
Getting the drill through it took a while, probably because I had the speed on my drill press set too low. Then I thought my Dremel tool would clean it up faster than it did. The metal base of the Comet is one TOUGH hombre! I was trying to err on the side of caution, and not leave myself too little metal for a soild mount; first off, it ain't no pot metal (appears to be some zinc/copper coating over decent quality steel), and it's 3mm thick, which is one more mm than I thought it'd be! The Comet is a GOOD piece of kit!
So here's what it looks like NOW, with PLENTY of room for the NMO base to fit through (I may take some silicone gel and gasket it in place, for extra protection).
Thankfully, my other hobby, will take care of the exposed metal. A little touchup with a Birchwood/Casey bluing pen, oughta do the trick!
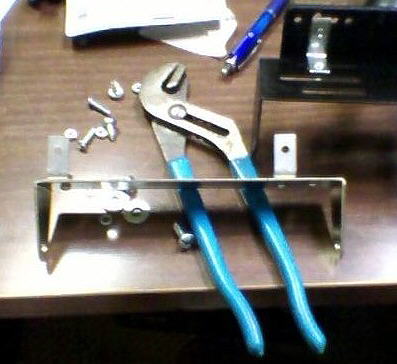
As it also poured rain yesterday (almost 2" worth!), that pretty much prevented doing anything IN the Jeep. So while waiting to go dashing to the hardware store for the FOURTH time last yesterday afternoon, I decided to assemble my pedestal mounts.
Having found THE one spot around the console/dash, that doesn't conflict with opening the glovebox, shifting the transmission, or mount over an airbag... I'm going with the Ram 7" pedestal mount, attaching the base high on the plastic trim BESIDE & slightly FORWARD of the shifter.
I can pull that piece out a bit at the bottom, work my hand behind it, and after drilling the seven, 3/8" holes needed to mount the round base, I can hold the nut and washer on underneath, as I tighten them down with a screwdriver from the outside (yes, turning the big handle on the outside of the mount releases the base mount and the radio mount, for ease of installation - also makes it easy to REMOVE the radios en masse, if you need to store them somewhere). And it WILL need to be STRONGLY secured, given what I'm about to load it down with!
Because I'm running a full-size Uniden 980 cb and a Bearcat BCT15C scanner, and because I'm mounting them at such an obtuse angle, the traditional radio bracket mount will put a radio at an unusable angle. And besides which, I'm mounting BOTH radios, to this ONE bracket!"HOW?!?!," you ask? Through the magic of 90o "L" brackets!
(From this point on, it's crappy cellphone pics - I'll use a REAL camera in the future... ). I was working at my office desk, FYI - hence the odd assortment of pens, packing tape, and other office detritus in some of the photos.
NOW that the scanner antenna mount is good to go, running coax and power cables will be the biggest headache. More pictures and story to follow...


 Reply With Quote