For the lack of a better name, the expeditionportal has a thread call Homebrew.
This is for DIY homemade Jeep modifications.
HomeMade Mods
We should have something like that here.....what do you think???


For the lack of a better name, the expeditionportal has a thread call Homebrew.
This is for DIY homemade Jeep modifications.
HomeMade Mods
We should have something like that here.....what do you think???

Sounds like a good idea. Just put stuff that is home made in the thread no bolt on stuff is that what you are thinking.
Shelves, storage devices etc, you make it, you solve it, put it here.Originally Posted by Sal-XK

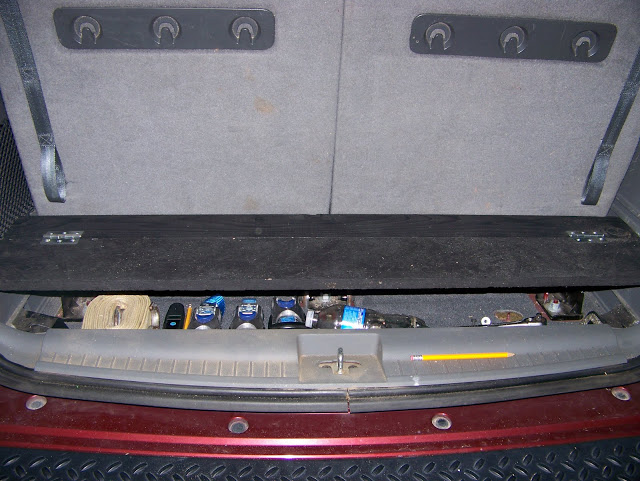
Now look before you guys say anything about it keep in mine it cost me $2.50 so far and thats for the hinges. I grabbed what ever I had laying around the house to put this together and so far I'm thrilled with it. Ok so here are the pics.
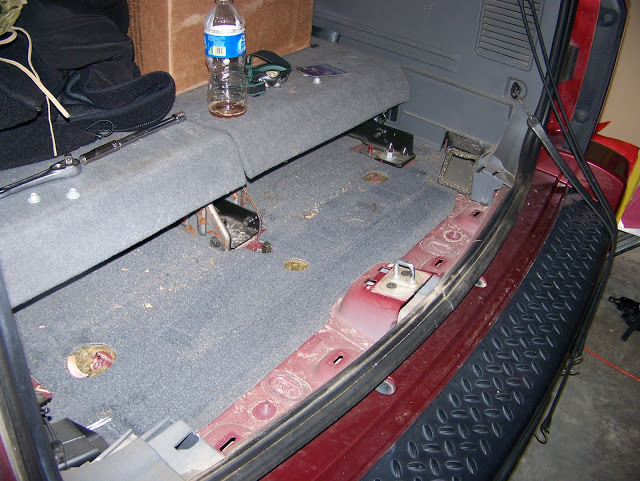
Removed the jack and the stock storage box for it.
I decided not to make an actual box for a few reasons. One it would probably cost me money. Second that area is not square and has lots of things in it to build around which meant I would have had to make a much smaller box then the space that is available.
Ok so I have it down to bare bones and now understand what hoaxci5 was talking about with support.
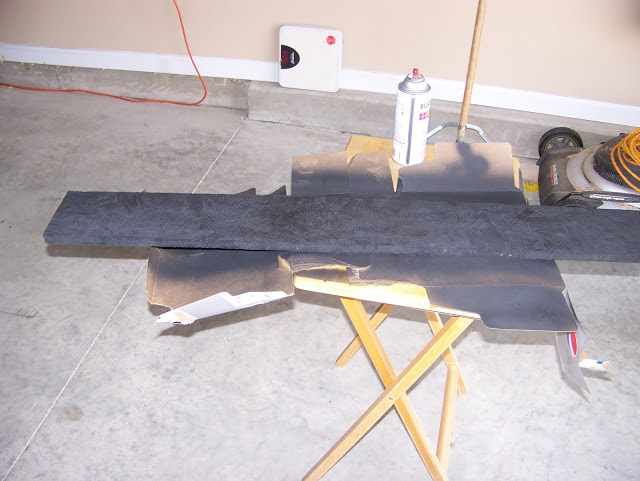
I decided to go with a hinged lid so I fitted a piece of wood to anchor and attach the lid to. I also decided to paint every think black until I figure out what to cover it with.
I got the two pieces connected with hinges and was looking good.
I had to make some adjustments to make it work
Then I decided to add a back to it keep things in place, it's left over laminate wood flooring LOL. It served a second purpose of adding support to the thing as well.
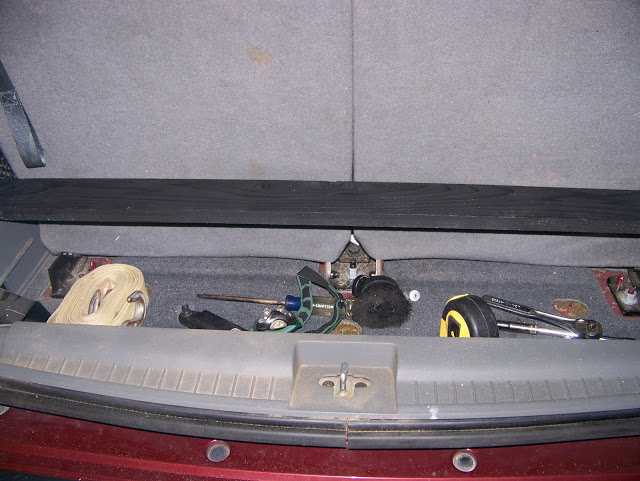
So this is it fully loaded, When the rear lid closes it butts directly up to the lid sealing the area off.
Here is a shot of all the stuff I have in it right now. I was able to get rid of my tool box I carried as well
Last edited by Sal-XK; 06-24-2011 at 10:10 AM.
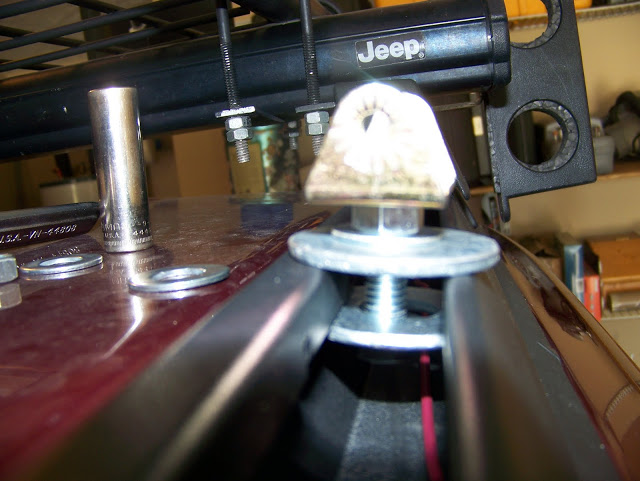
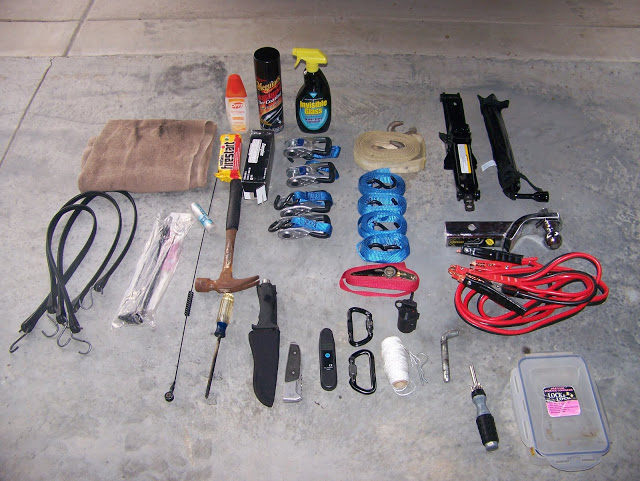
Put these nuts and washers together so I could mount any thing I wanted using the channel on the rails. 1 bolt 4 washers 2 nuts. Bolt length depends on what you're mounting and how much thread you need sticking out the top.

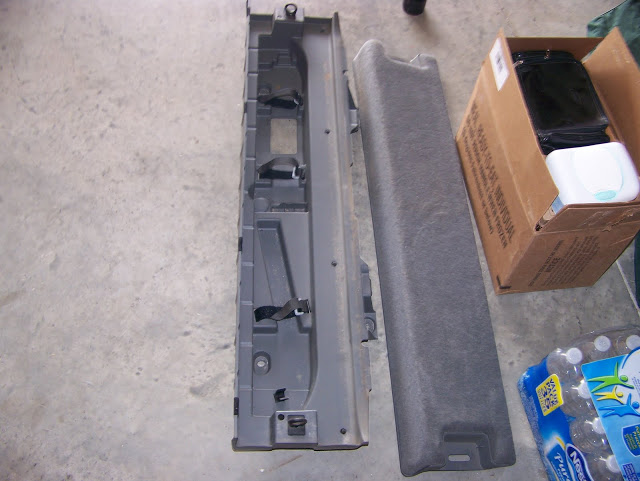
Here's what I did when I first bought the Jeep.
The 3rd row was wrapped in plastic and hauled out to a shed.
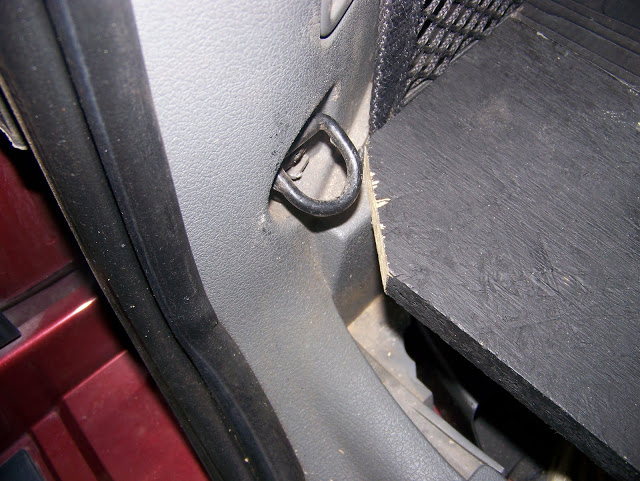
I built a framework from pine. The wedge shaped area holds a floor jack. The lid is plywood with matching (well, a close match) carpet stapled to the lid. I left the original jack storage because other stuff fits there, and it's part of the rear HVAC system. The holes in the 1x6 pine are for the heating vents to flow.

2006, 4.7L, QTII, Toyo Wild Country M/T 265/70R17 tires, Ultrasport 175 wheels, Rocky Road 2.25'' lift kit, HID off-road lighting, Surco 50x60 roof rack, Foxwing awning, Superchips performance programming.
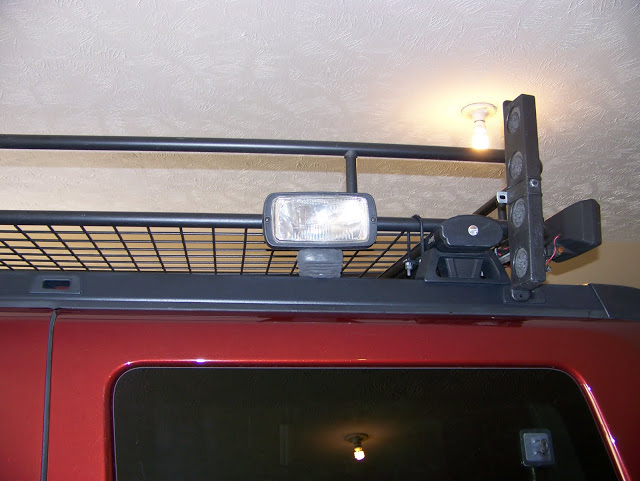
I mounted a piece of aluminum angle to the front bumper. The light mount is two pieces bolted back to back to form a Z shape of sorts. I added a piece of 1/16" sheeting cut into about a 1x10" piece to add anti-wobble strength to the angle. The piece is pop-riveted to the angle, and bolted behind the grill. The HID lights mount to the angle piece, and they're pretty solid there.

Last edited by Adondo; 06-24-2011 at 03:46 PM.
2006, 4.7L, QTII, Toyo Wild Country M/T 265/70R17 tires, Ultrasport 175 wheels, Rocky Road 2.25'' lift kit, HID off-road lighting, Surco 50x60 roof rack, Foxwing awning, Superchips performance programming.
A buddy has a pile of this stuff laying around. It's surgical stainless steel screen that came from Ice Harbor dam. (It was a fish screen) The stuff is next to impossible to cut or drill.
We used large-head pop-rivets (About 7/8" across) to make it part of the rack. Now, anything can be tossed up onto the rack, nothing can fall past the rack's bars to the roof. The floor works fantastic when used with a Thule roof storage bag.
A major side benefit is the SS material reflects the sun, so no heat makes it to the Jeep's roof itself. Open the sunroof to vent mode, and the Jeep stays barely above ambient inside.
The same idea could be applied by using expanded mesh, either steel or aluminum.
2006, 4.7L, QTII, Toyo Wild Country M/T 265/70R17 tires, Ultrasport 175 wheels, Rocky Road 2.25'' lift kit, HID off-road lighting, Surco 50x60 roof rack, Foxwing awning, Superchips performance programming.
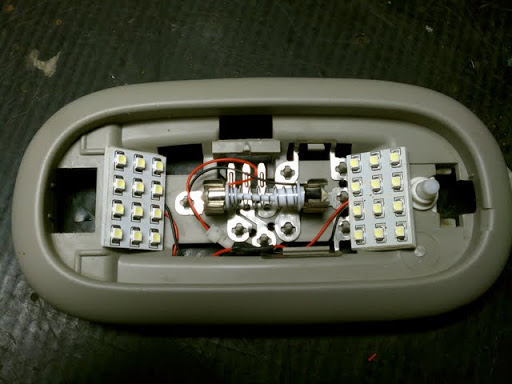
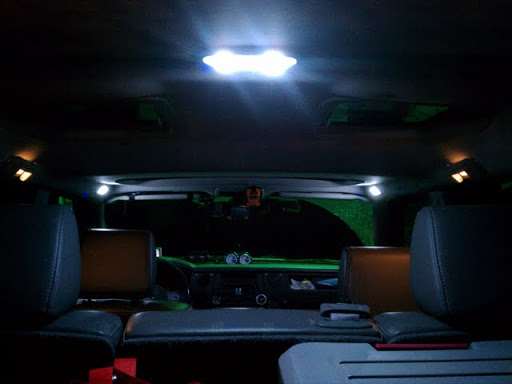
I bought a cheap interior light from the local-yokal auto parts store. (About $4) I ordered a patch type LED light from eBay, and tossed the original bulb. The light is mounted about in the middle, close to a removable trim piece in the plastic hatch trim. A wire was fished and spliced into the original (and pathetic birthday candle bright) cargo light. The light has its own switch.

2006, 4.7L, QTII, Toyo Wild Country M/T 265/70R17 tires, Ultrasport 175 wheels, Rocky Road 2.25'' lift kit, HID off-road lighting, Surco 50x60 roof rack, Foxwing awning, Superchips performance programming.
I upgraded my dome lights to LED's. eBay patch type lights work great, and are cheap. The front ones have one patch each, the center light has a pair of lights. The interior lights up like an open 24/7 Wal-Mart.
2006, 4.7L, QTII, Toyo Wild Country M/T 265/70R17 tires, Ultrasport 175 wheels, Rocky Road 2.25'' lift kit, HID off-road lighting, Surco 50x60 roof rack, Foxwing awning, Superchips performance programming.
There are currently 1 users browsing this thread. (0 members and 1 guests)
 Posting Permissions

 Reply With Quote